How to setup PIA S5 Proxy in Waterfox
Waterfox browser has the following advantages:
1. Faster speed and better performance.
2. Better privacy protection, can block ad tracking and third-party cookies.
3. Support traditional Firefox extensions and themes, you can personalize your browser.
4. Support more operating systems, including Windows, macOS, Linux and Android.
5. Support more languages and regions to meet the needs of global users.
6. Provide better compatibility and stability, which can ensure the normal display and operation of web pages.
step 1:
Download and install Waterfox: https://www.waterfox.net/?p=PIA
Step 2:
Add proxy settings
1. After selecting the country, continent, and city, click the "Refresh" button, then right-click to select the proxy IP and port
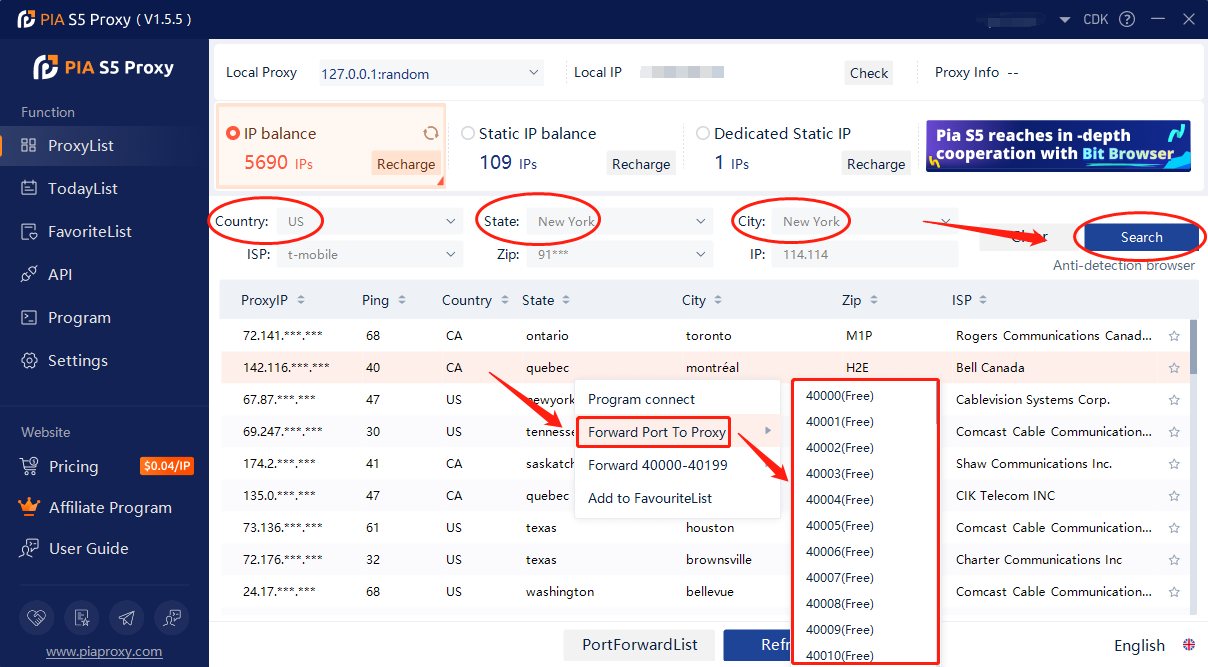
2. Then click the port forwarding list below to copy the port number you just selected
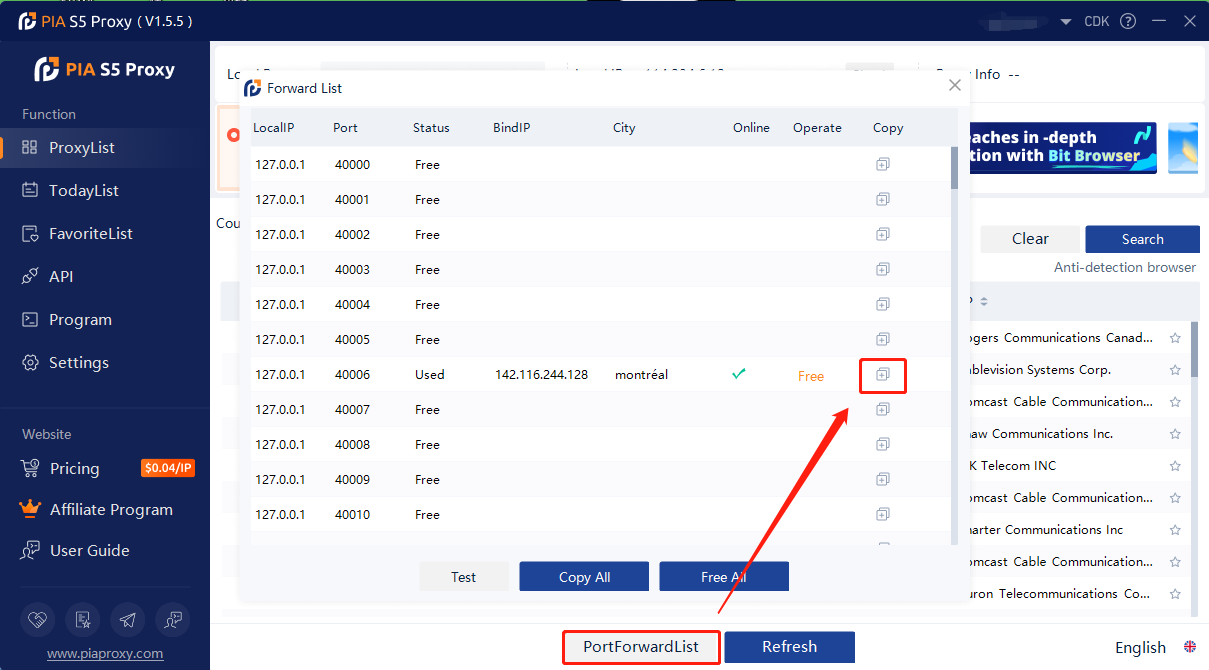
Step 3:
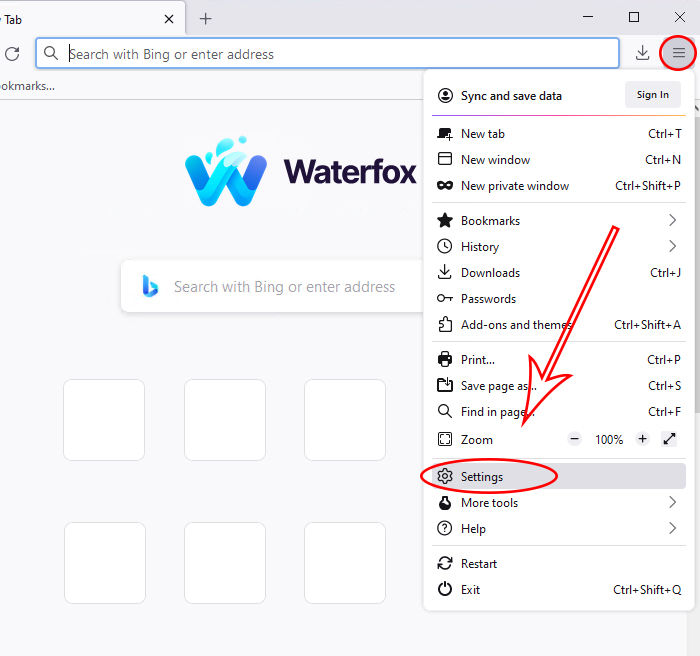
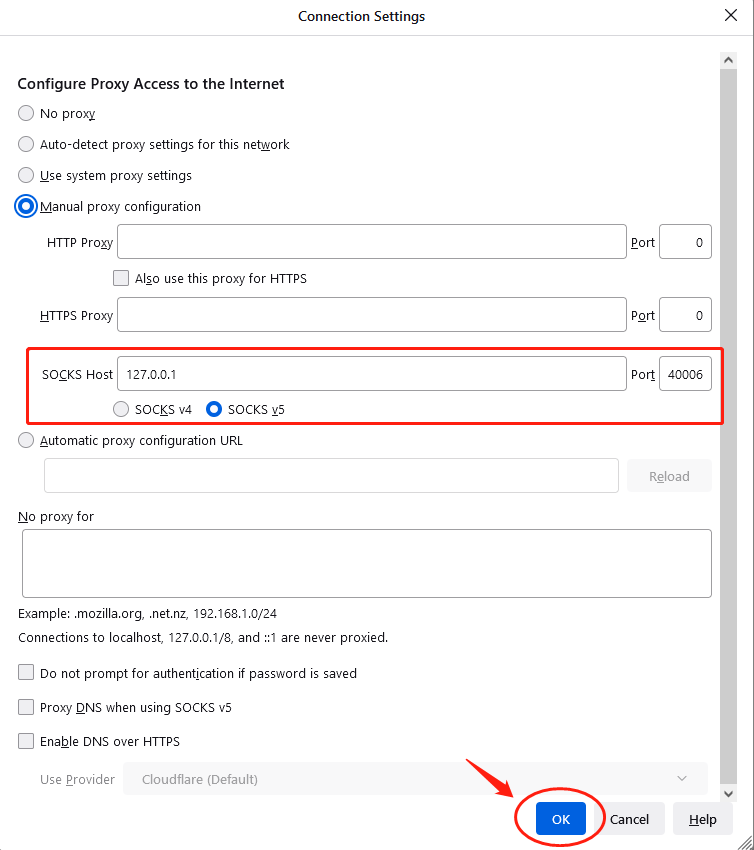
Open Waterfox > Settings > Network Settings > Check Manual Proxy Configuration > SOCKS Host Enter IP Address, Port > OK
1. Open Waterfox browser and click Settings
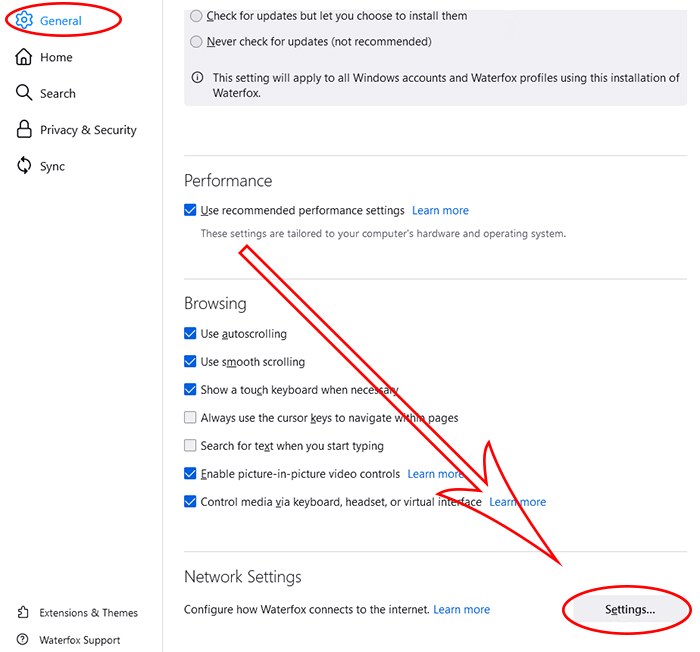
3. Enter the general page, slide the bottom of the page and click Settings
3. Check manual proxy configuration
4. SOCKS Host input proxy IP address, port
5. Click OK
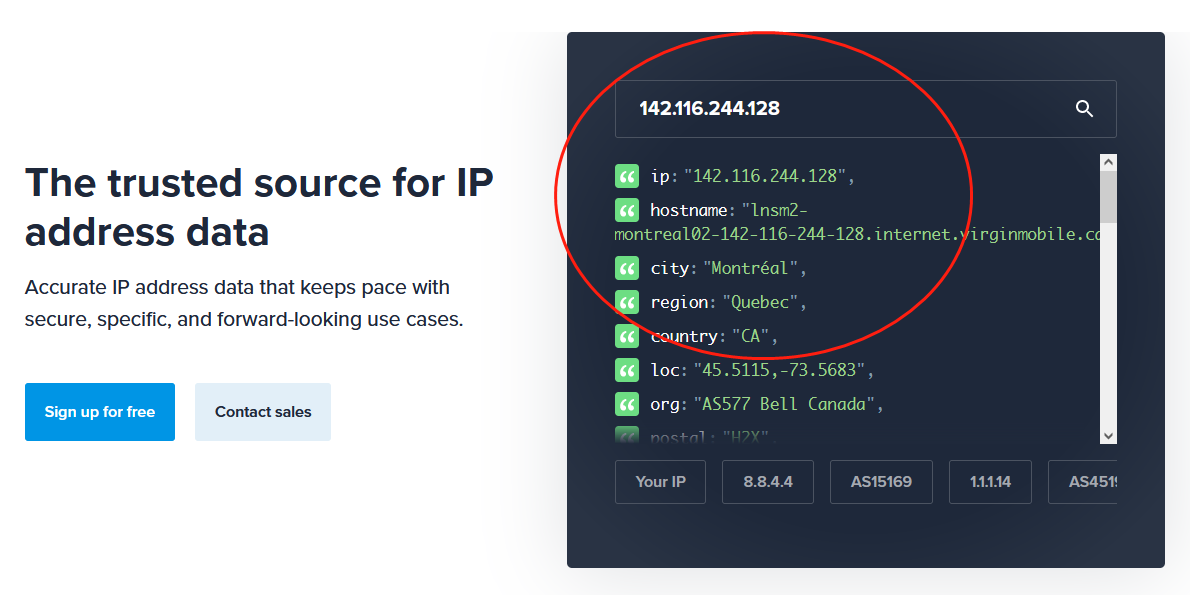
7. Open a new window to detect the IP address, which is the assigned agent
Click to view detailed video tutorial——
Follow the process above and you're ready to get started with Waterfox . If you have any questions about the integration, or want to learn more about other topics, you can consult the online customer service for help


