How to set up PIA S5 Proxy in AdsPower
AdsPower browser management tool provides an independent browser for each account
If you need to use the AdsPower client to start multiple browsers, you must first set up the local proxy.
AdsPower supports mainstream IP proxies on the market, including IP proxies for HTTP, HTTPS, and Socks5 protocols.
For the PIA S5 proxy service that everyone is familiar with, today I will introduce in detail how to change the proxy settings on the AdsPower client.
AdsPower main functions:
1.Browser fingerprint function: set a specific fingerprint for each account to ensure security
2.Super browser function: open multiple browsers, each browser has an independent environment
3.Batch management function: batch import and export accounts, and agent information
4.Automation function: batch automation operation, and real-time monitoring of operation progress
5.Recycle bin function: supports recovery of environments deleted within 7 days, hand slipping can also save
Download and install AdsPower
URL: https://www.adspower.com/?p=PIA
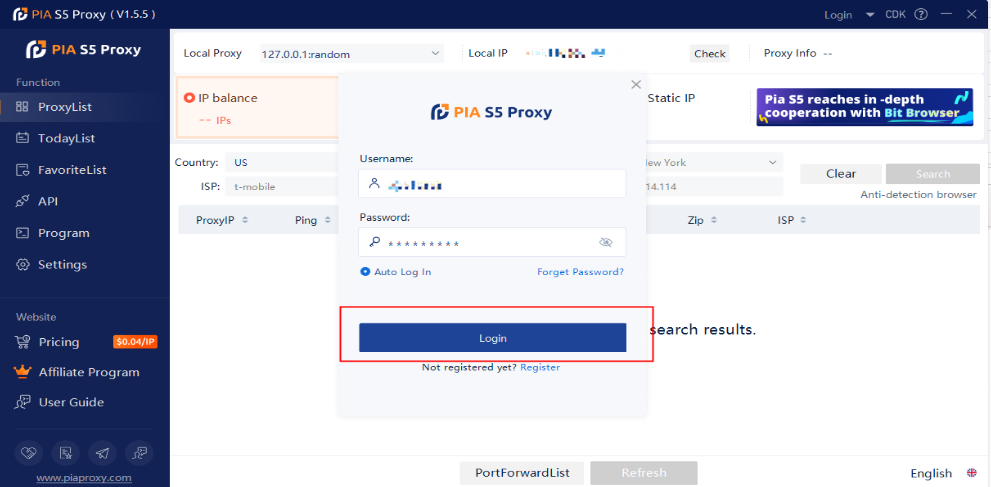
1. Open the Piaproxy client and log in
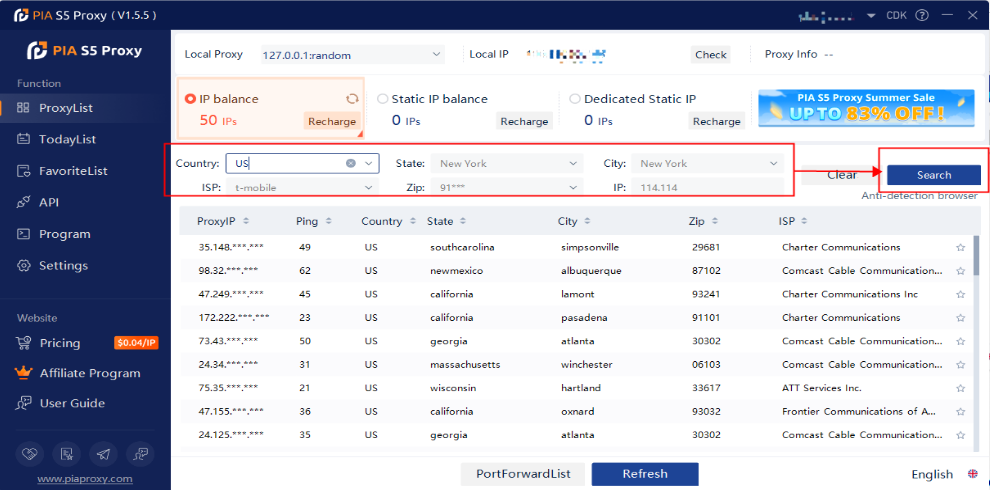
2. Complete the Country, City, Postal Code fields and other information as required.
3. Click "Refresh"
4. Select a proxy from the list and right-click. Select "Forward Port To Proxy" and select a port from the drop-down list, such as 40001.
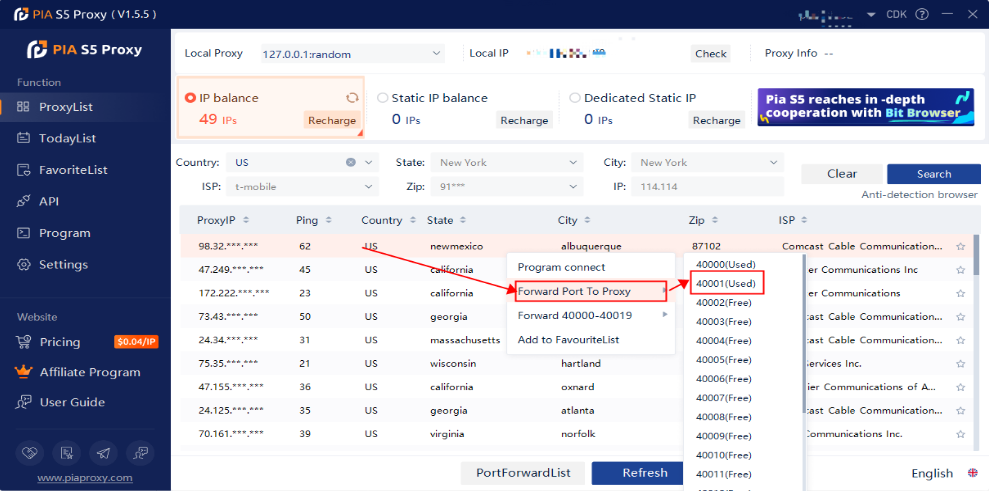
5. Select "Forward Port To Proxy" and select a port from the drop down list, for example 40001
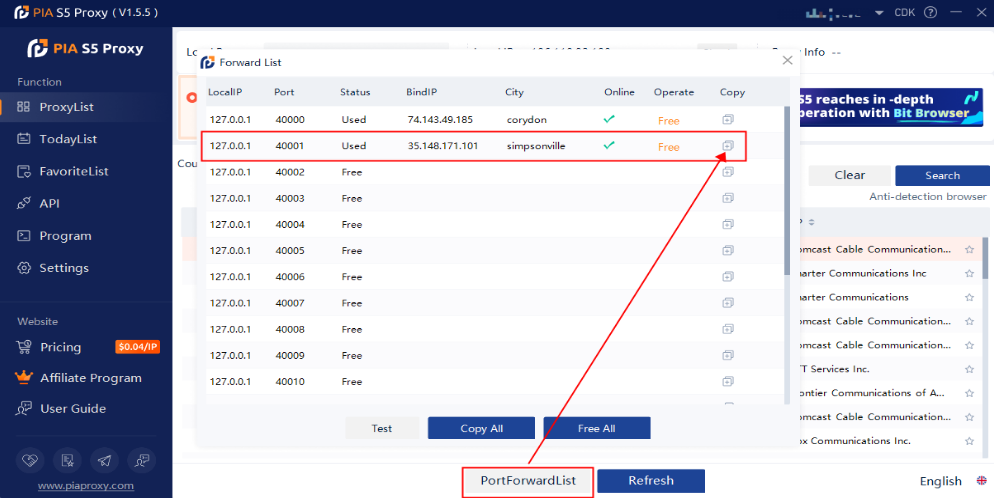
6. After completing the above operations, you can see the detailed proxy parameters in "PortForwardList". View and copy agent information, fill in AdsPower program.
7. Open Adspower browser and log in
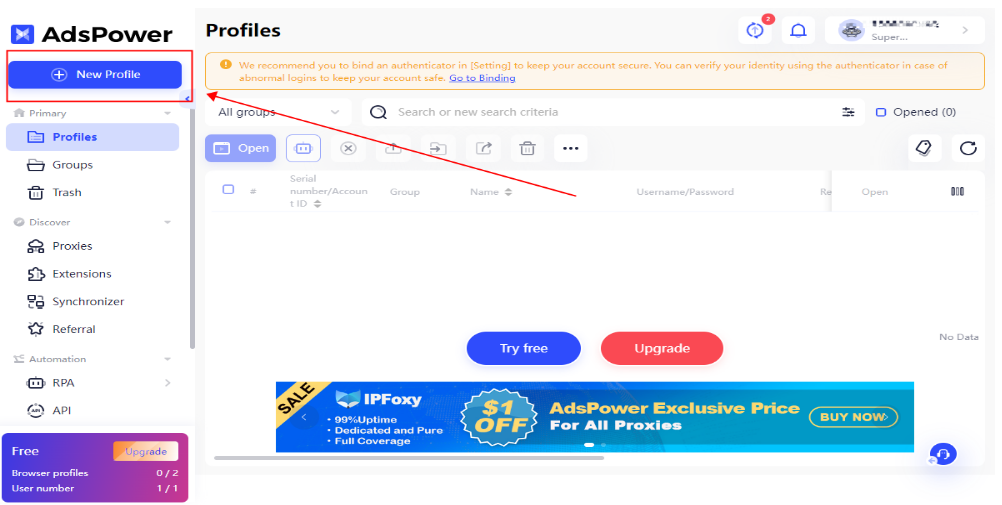
8. Click the "New Profile" button to create a new profile
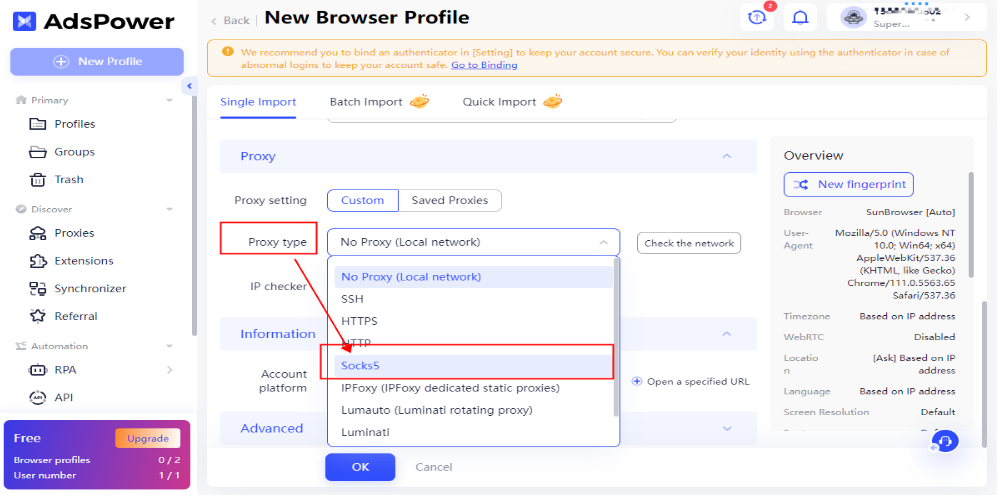
9.Select proxy type
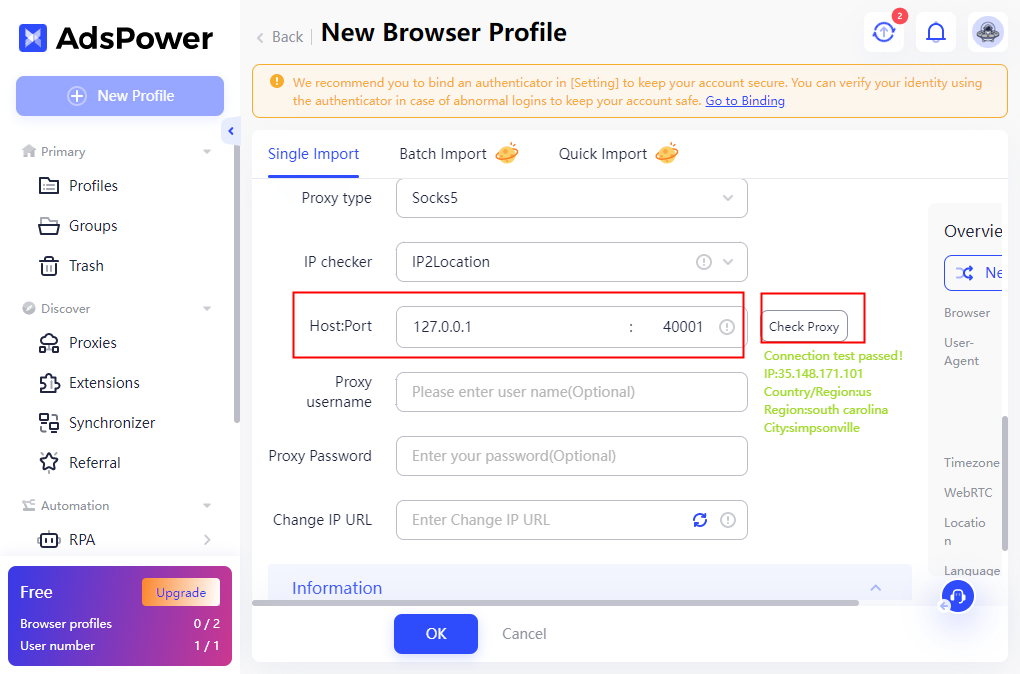
10.Fill in the proxy information and click the "Check Proxy" button to check the proxy information;
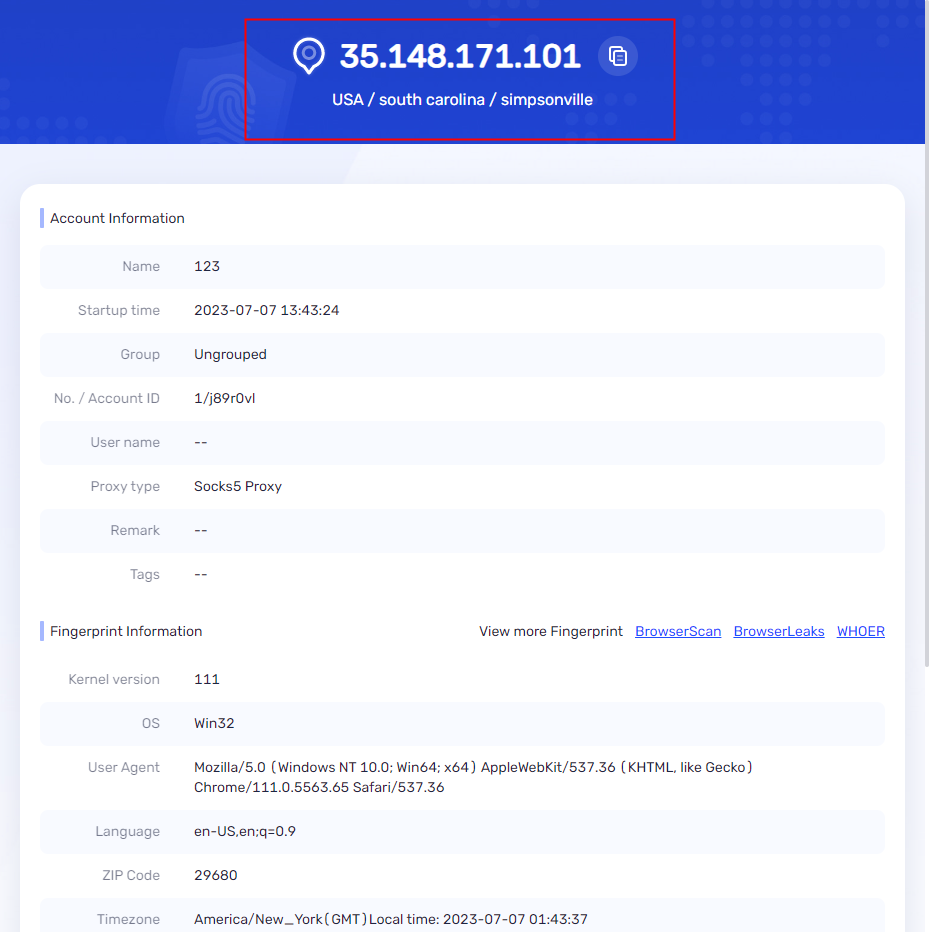
11.Click the "Open" button to start the configuration file.
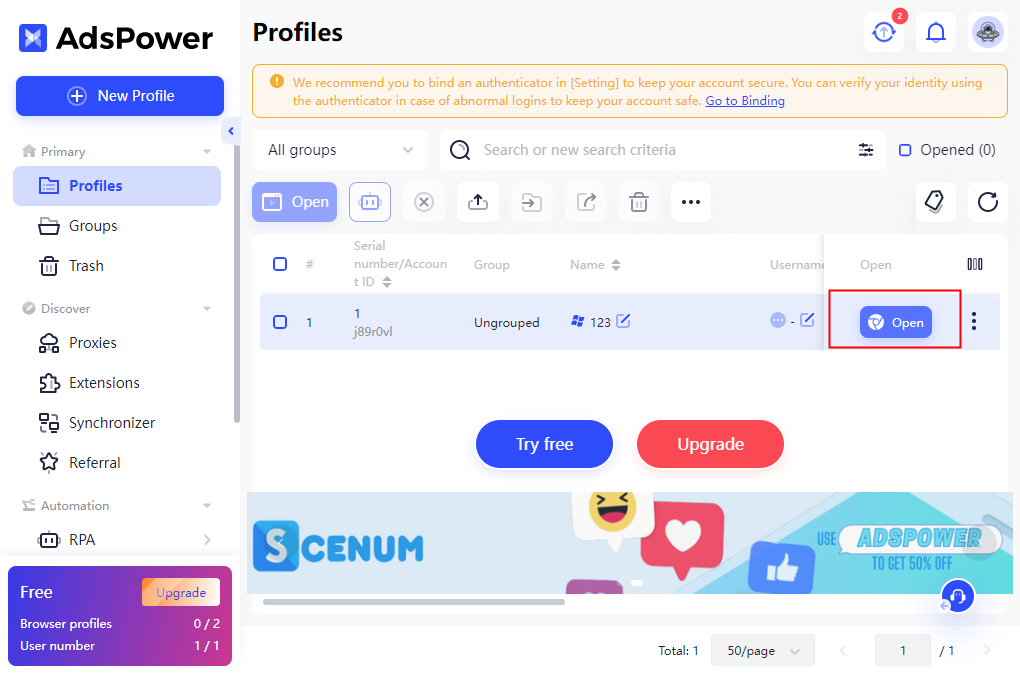
12.Now you can start working!
Click to view detailed video tutorial——
Follow the process above and you're ready to get started with AdsPower. If you have any questions about the integration, or want to learn more about other topics, you can consult the online customer service for help


