How to set proxy server on Lalicat browser
Compared with other browsers, Lalicat browser has the following advantages:
1. fast loading pages
2. Uses less memory
3. With a variety of browsing modes, such as privacy mode, reading mode, etc.
4. Built-in ad blocker and privacy protection function to protect users' personal information and browsing security
5. Plugins and themes can be customized to meet different needs and preferences of users
To sum up, Lalicat browser is a powerful, easy-to-use, safe and reliable browser, and it is a good choice.
step 1:
Download and install lalicat
Website: https://www.lalimao.com/?p=PIA
Step 2:
Add proxy settings
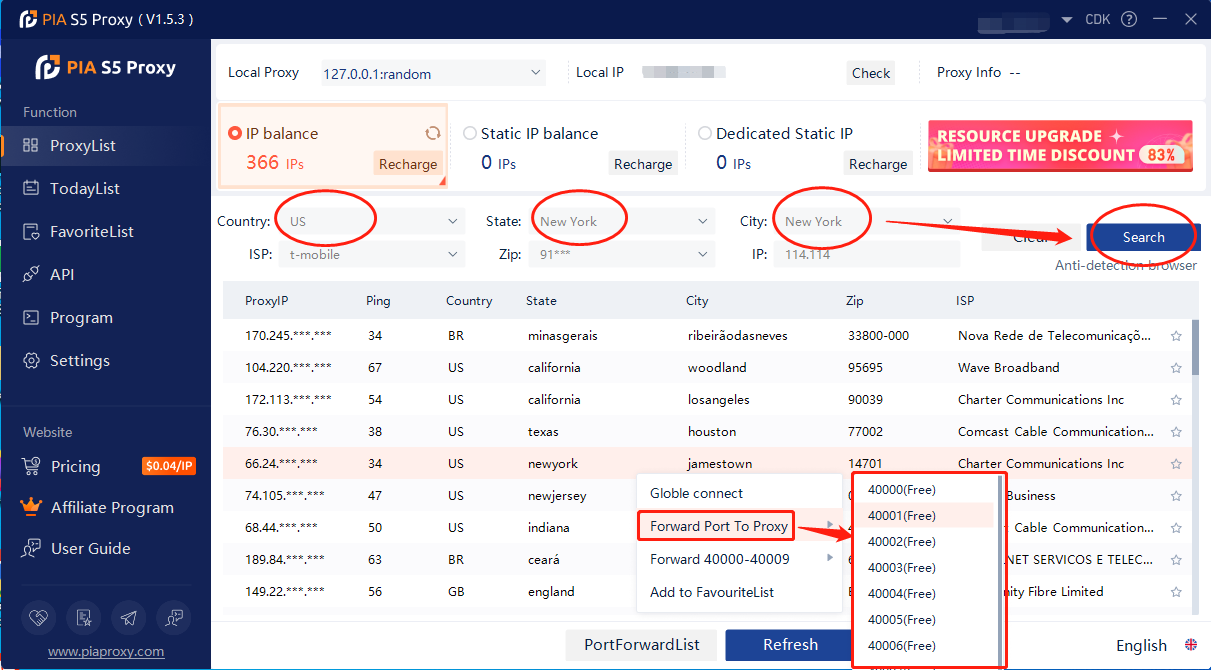
1. After selecting the country, continent, and city, click the "Refresh" button, then right-click to select the proxy IP and port
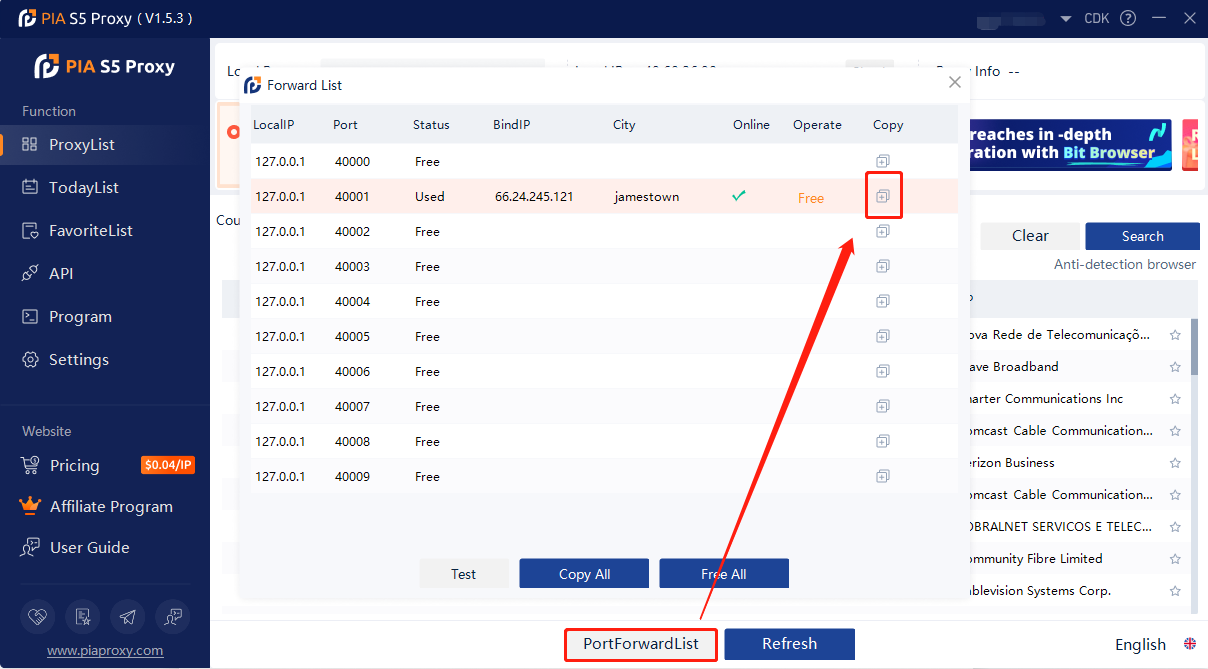
2. Then click the port forwarding list below and copy the port number you just selected
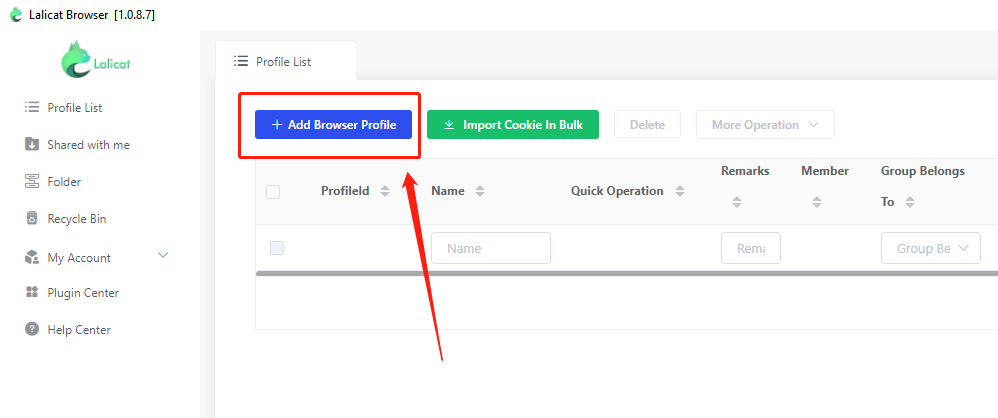
3. First open the Lalicat browser, click Add browser configuration file
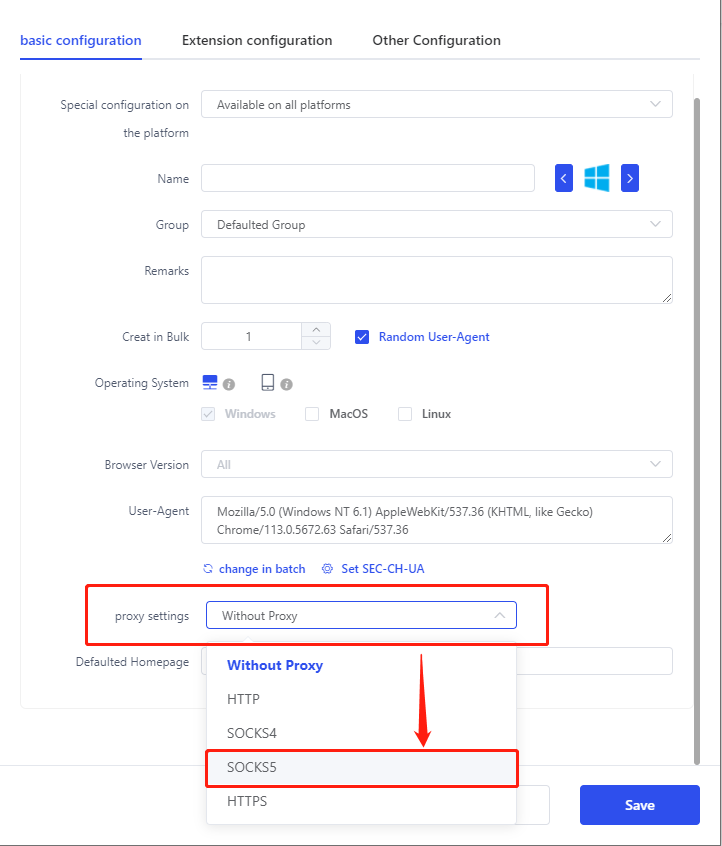
4. Enter the basic configuration, enter the name
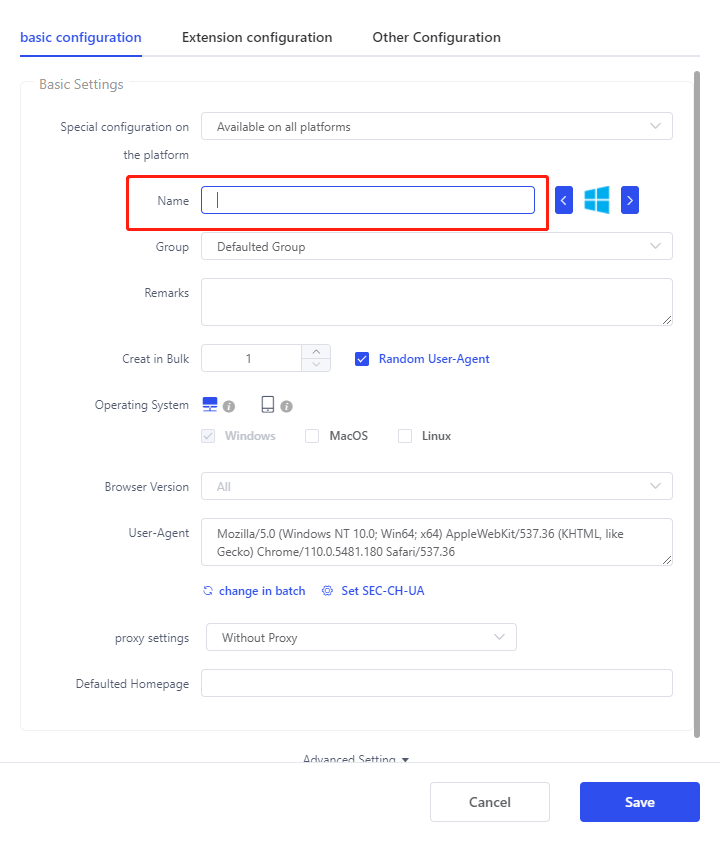
5. Click Proxy Settings and select SOCKS5
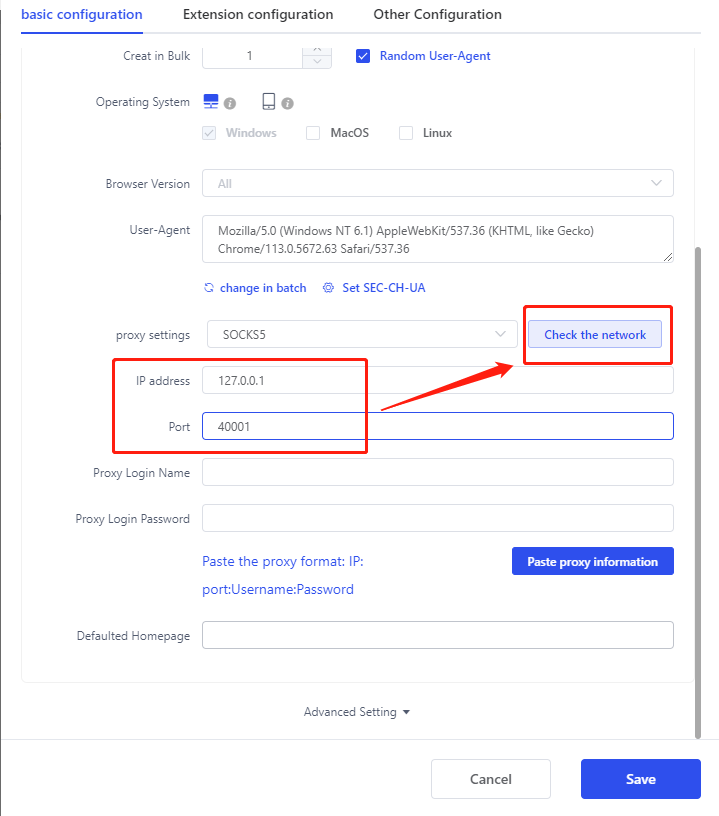
6. Enter the obtained IP address and port
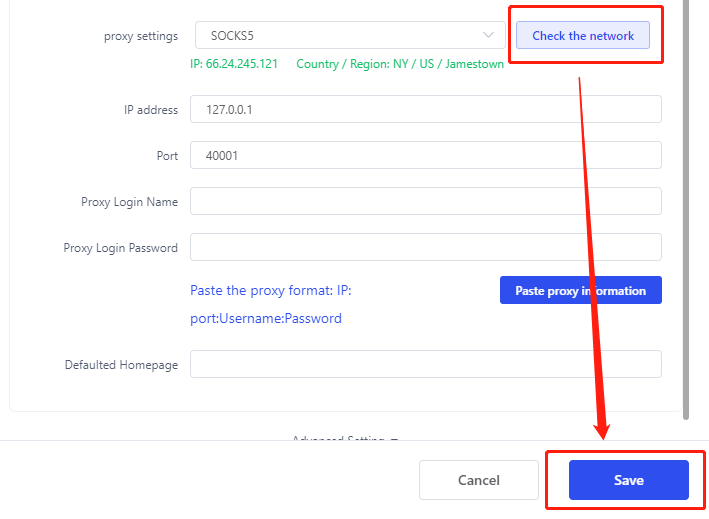
7. Click Check Network
8. Click Save
Click to view detailed video tutorial——
According to the above process, you can start using the Lalicat browser. If you have any questions about the integration, or want to learn more about other topics, you can consult the online customer service for help


