How to set up a proxy server on Ghost browser
The benefits of using Ghost Browser include:
Multi-tab page browsing: You can open multiple tab pages in one window and switch between different web pages conveniently.
Incognito Mode: Ghost Browser's incognito mode prevents the browser from recording information such as your history, cache, and cookies.
Security: Ghost Browser has features such as anti-malware and ad blocker, which can improve your online security.
High-speed browsing: Ghost browser adopts some optimization technologies, which can improve the loading speed of web pages and let you get the information you need faster.
Multi-device synchronization: Ghost browser can be synchronized with other devices, and you can use the same browser settings, bookmarks and other information on different devices.
step 1:
Download and install Ghost browser
Website: https://ghostbrowser.com/?p=PIA
Step 2:
Add proxy settings
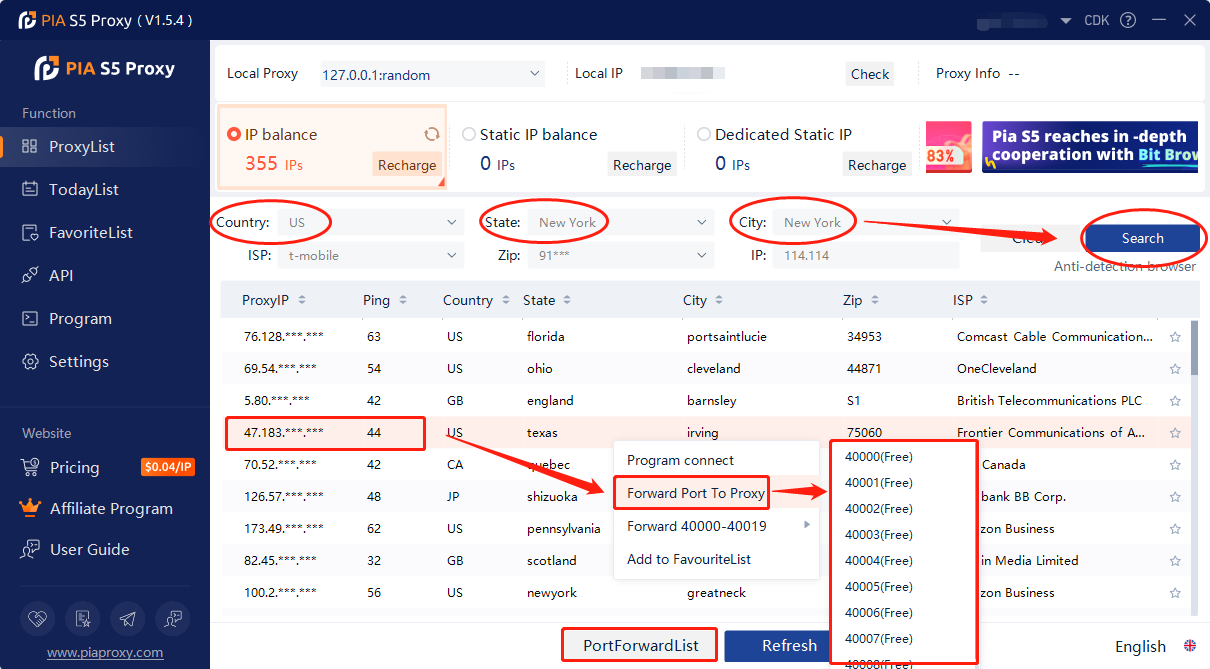
1. After selecting the country, continent, and city, click the "Refresh" button, then right-click to select the proxy IP and port
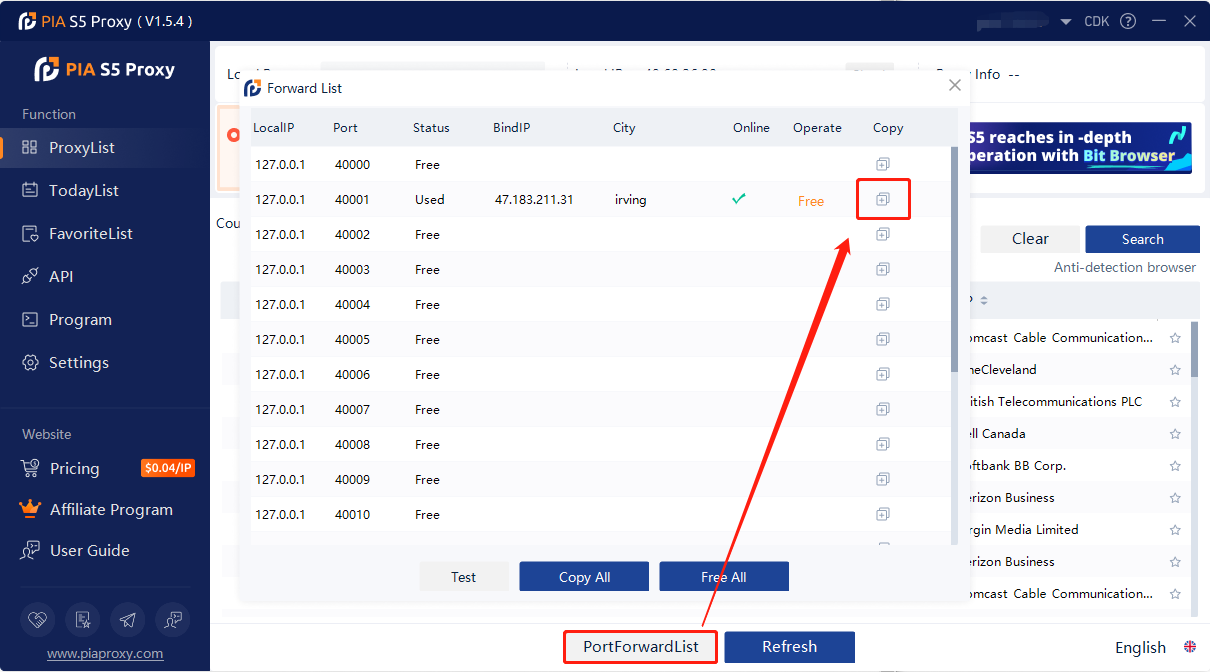
2. Then click the port forwarding list below and copy the port number you just selected
3. Open the Ghost browser and click the icon in the upper right corner
4. Click Add/Edit Proxy to go to the Ghost Proxy Control tab

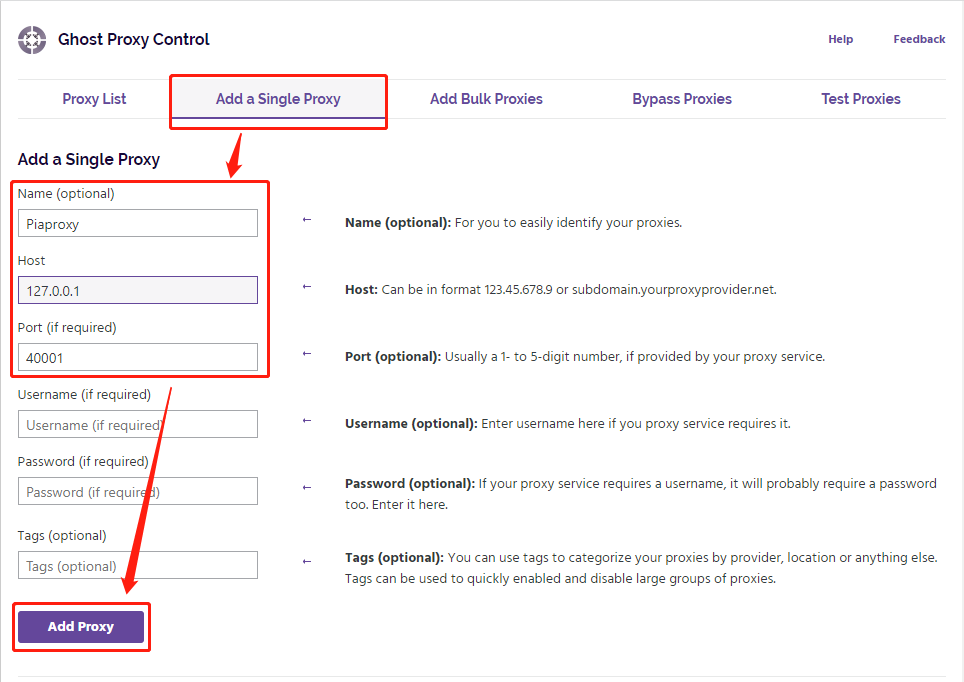
5. In the Add/Edit Proxy tab, create your proxy name
6. Paste your PIA proxy credentials (IP and port), click Add Proxy
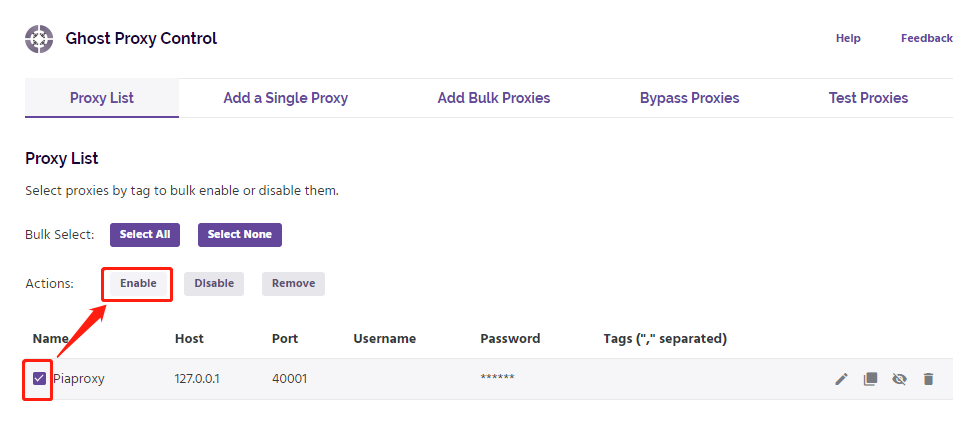
7. Click on the proxy you created and click on the Enable button
8. Open the Ghost Proxy Control tab, select the proxy you added, and click Reload
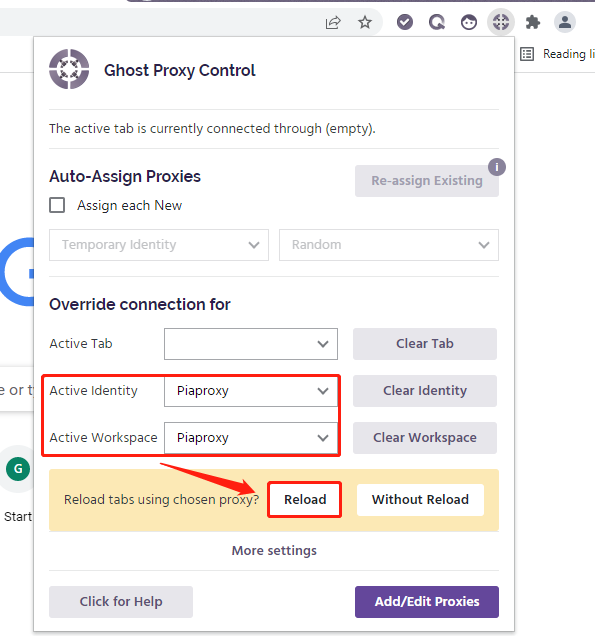
9. Now the proxy IP has been set up
Click to view detailed video tutorial——
According to the above process, you can start using the Ghost browser. If you have any questions about the integration, or want to learn more about other topics, you can consult the online customer service for help


